
Settings > My Account > Email Settings
Microsoft 365
If you use Microsoft 365, go straight to our Email Sync for Microsoft 365 page to connect your Microsoft account.
Setting up your email for Gmail
| Type |
IMAP |
| Incoming server |
imap.gmail.com* |
| – Port |
993 |
| – Encryption | SSL |
| Outgoing server (SMTP) |
smtp.gmail.com |
| – Port | 587 |
| – Encryption | TLS |
| Username | Your email address |
| Password | App Password |
* To sync your Gmail inbox with Recruit So Simple, enable ‘Auto-Journal Incoming Emails‘ located in the blue preferences panel
Creating an App Password for Gmail
To send email from the database via your Google account, Google requires that 2-Step Verification is enabled on your account, and that you generate an App Password. This is a unique password that allows Recruit So Simple to send emails using your Google account.
- Log in to your Google account.
- Click Security, look for 2-Step Verification and make sure this is enabled
(If you can’t see 2-Step verification, ask your Google account administrator to enable it in the Security section of the Google Admin Console)
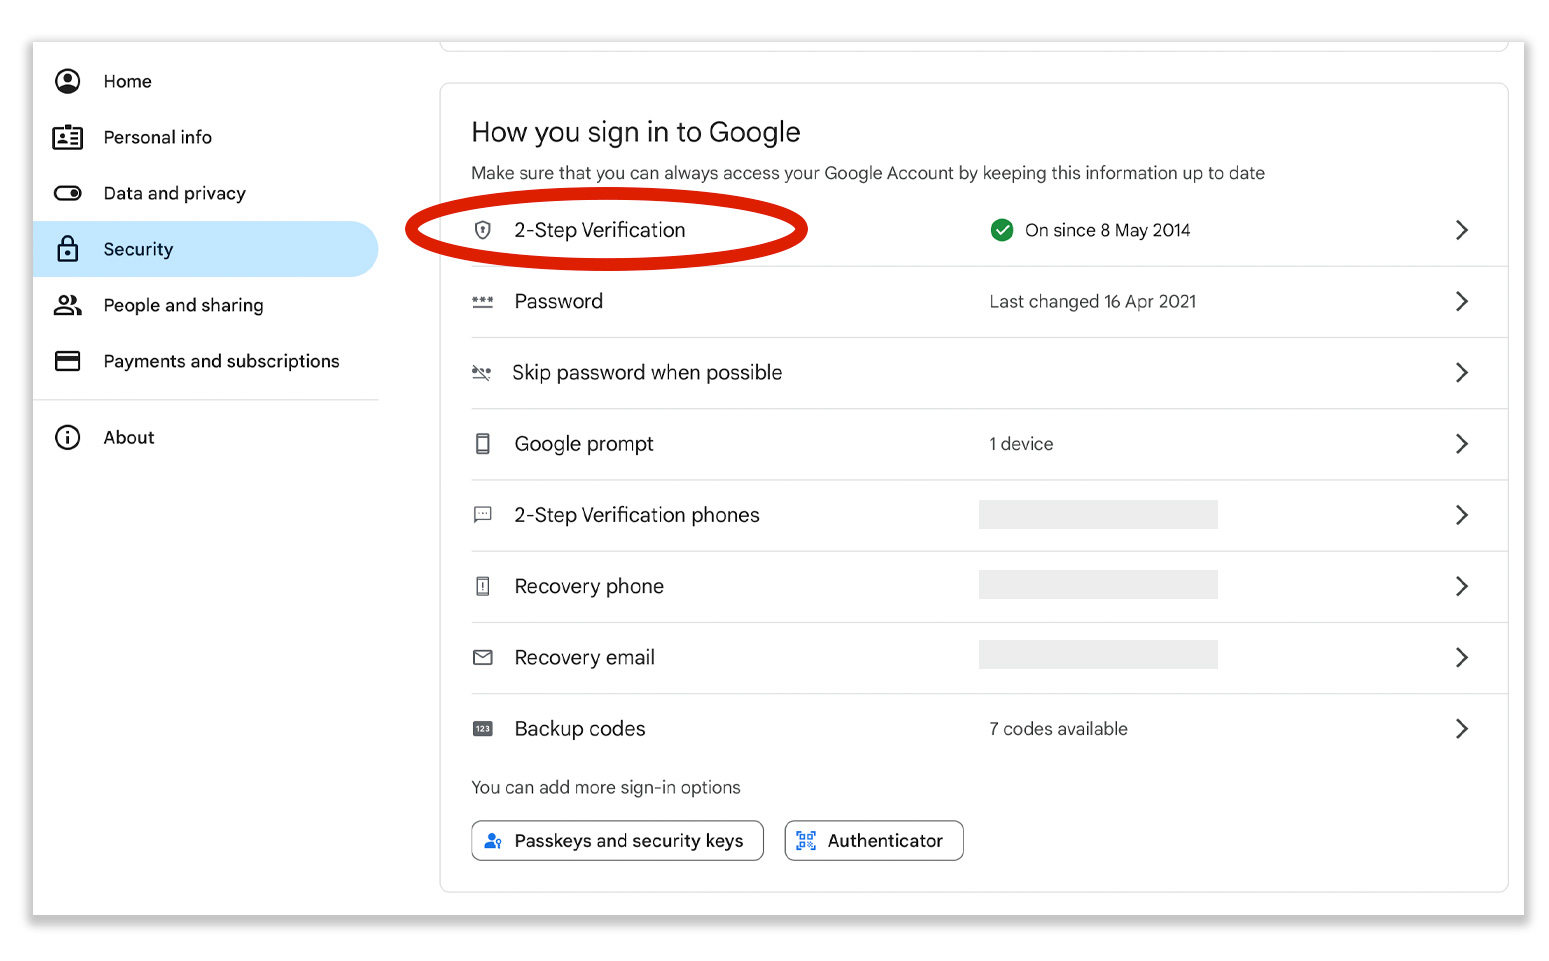
- Click 2-Step Verification, and look for App Passwords:
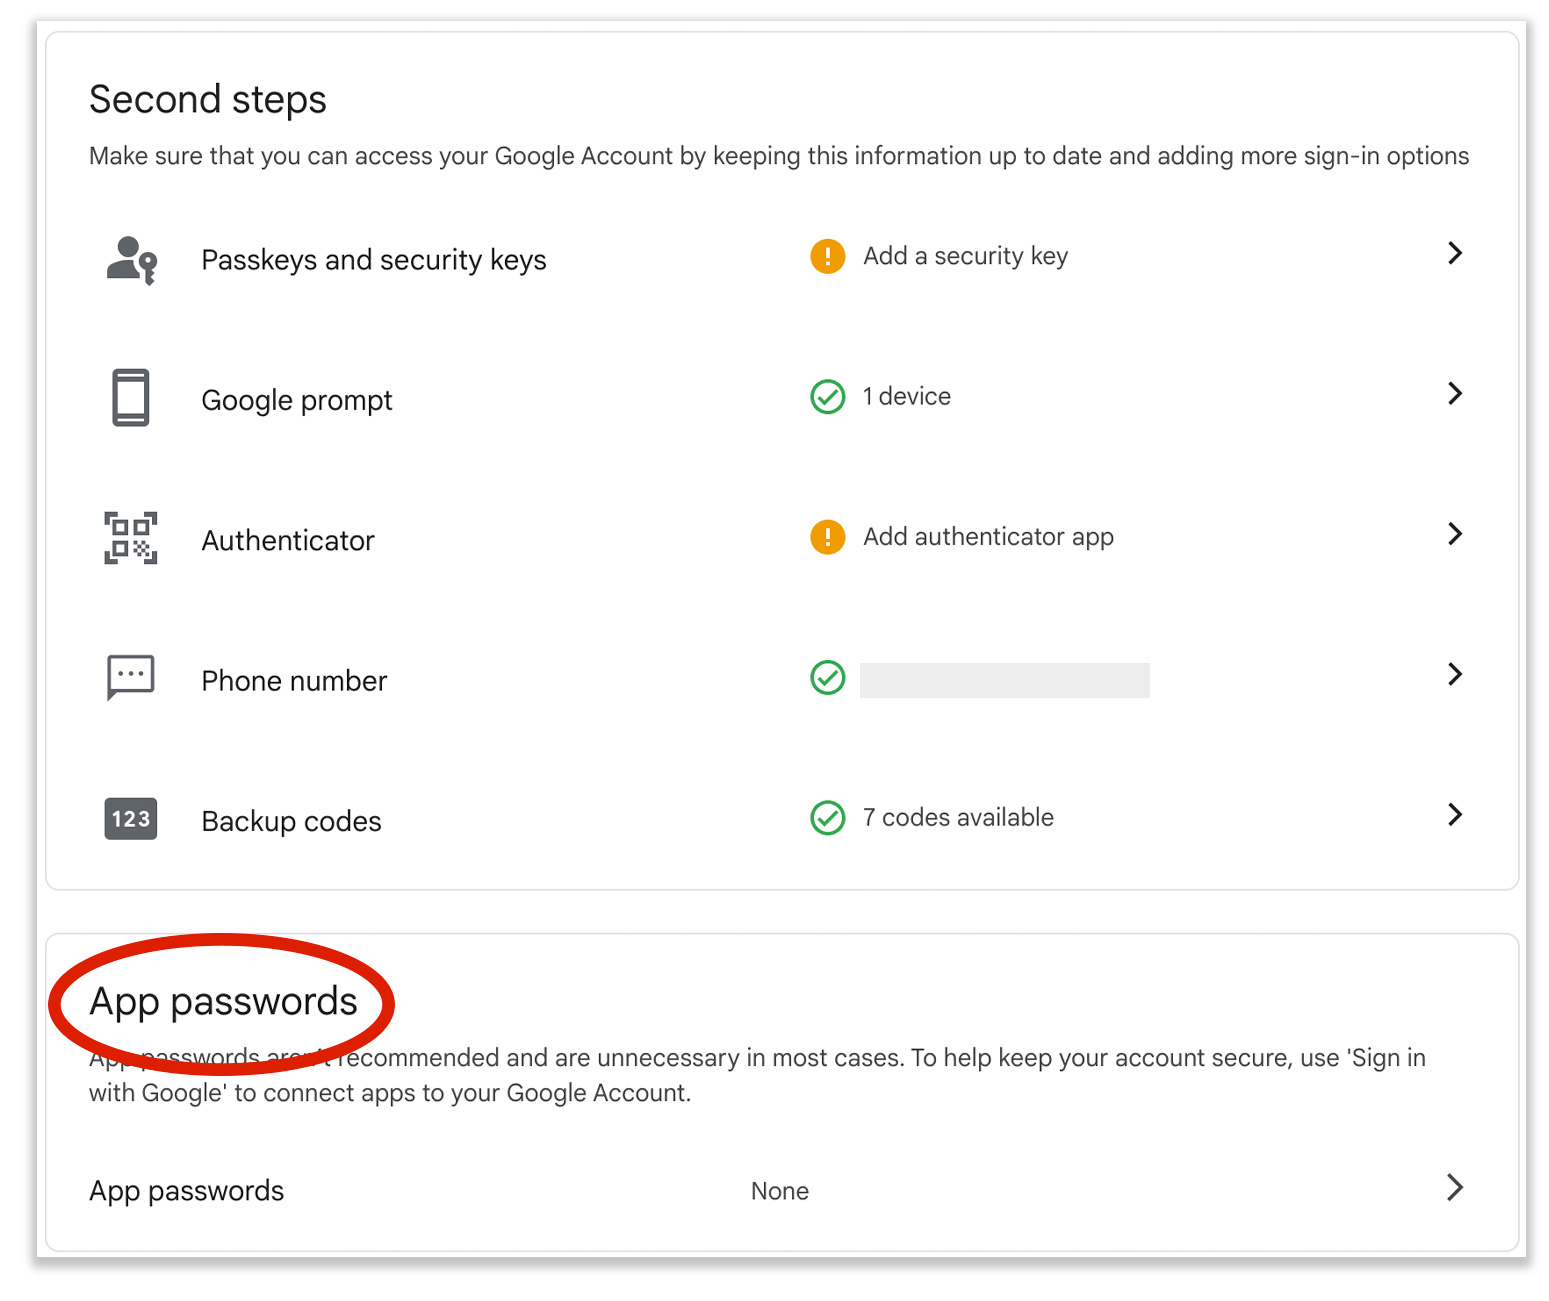
- Follow the prompts to create an App Password. You could name it RSS so you know what it is for in the future. Copy and paste the app password, without spaces, into your Recruit So Simple email settings, under [Settings > My Account > Email Settings].
- Save any changes and try the Test Settings button.
Setting up your email for other email providers
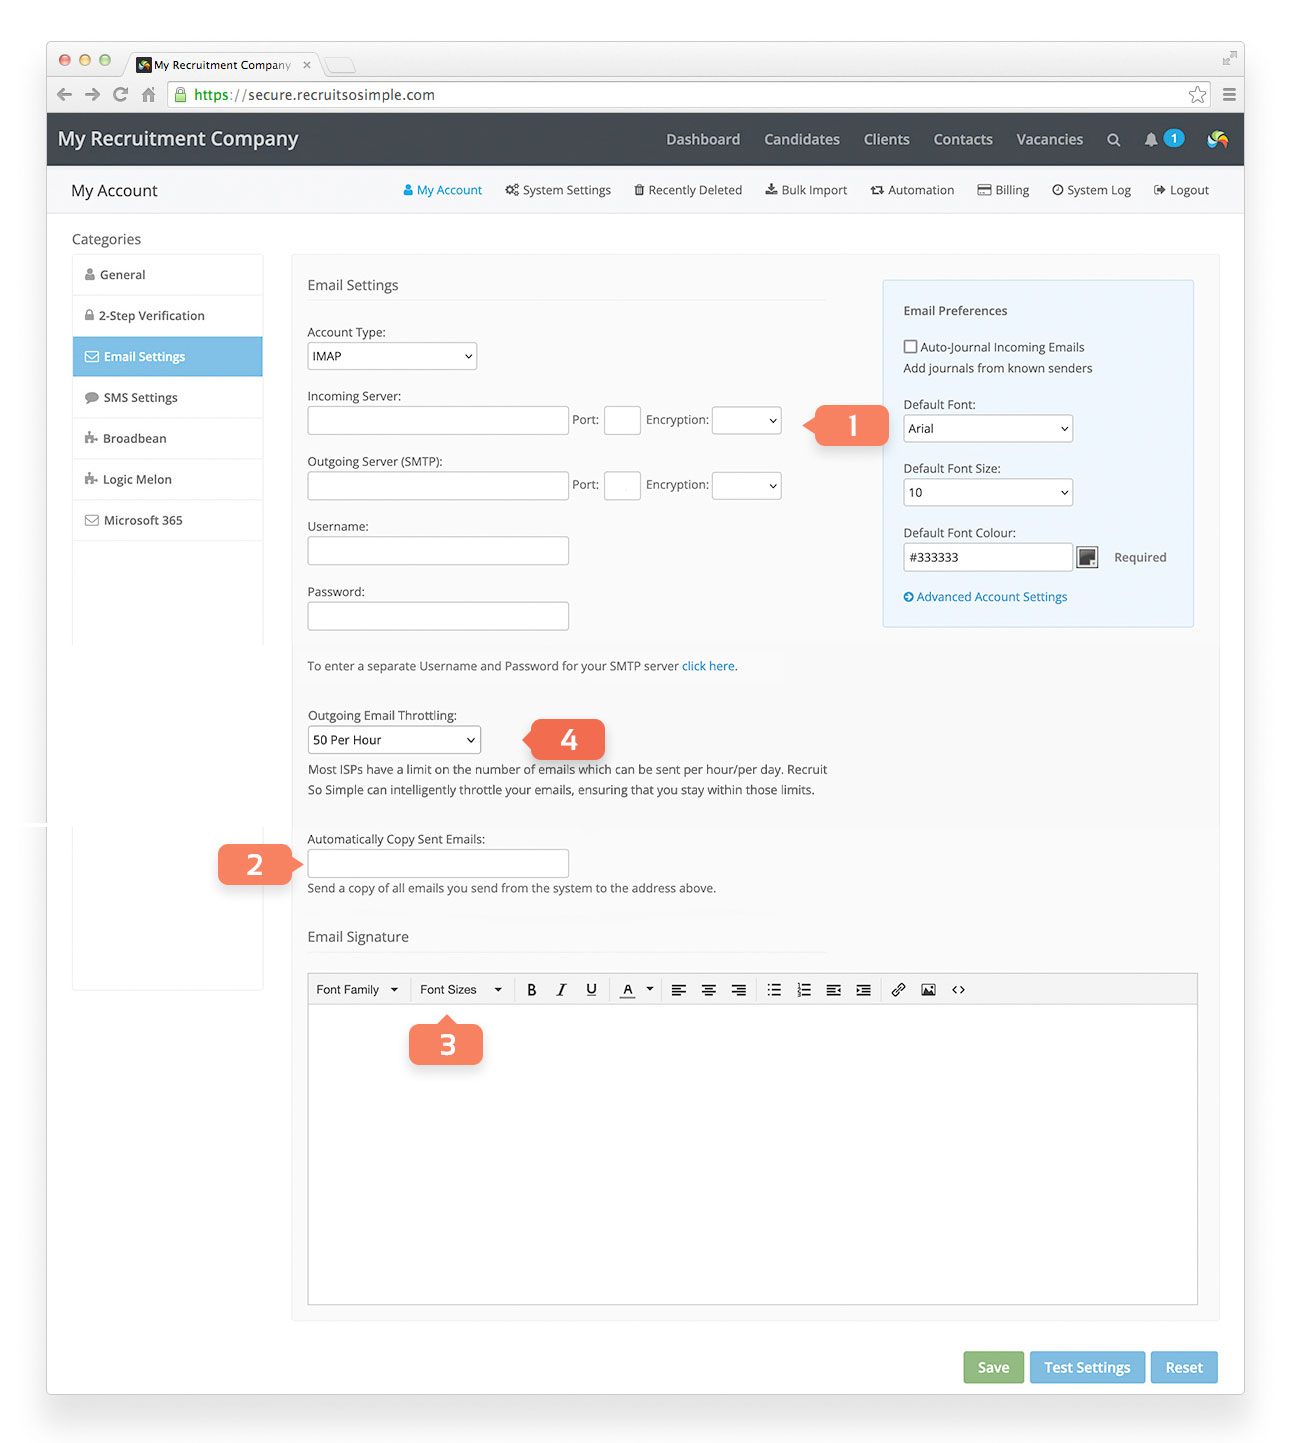
Ask your provider for their incoming and outgoing server settings as shown in [1]. Save any changes and try the ‘Test Settings’ button.
Additional settings
Automatically Copy Sent Emails [2] will send a copy of all email sent from the system to a specified address. Your RSS ‘Sent’ box only stores the last 100 items. If you’re sending important emails (e.g. terms of business) that you may need in the future, this feature will ensure that you have a copy in your usual email client’s inbox.
Outgoing Email Throttling [4] limits the number of emails that are sent on a per hour, ranging from batches of 50 to 1000 emails each hour.
The Microsoft 365 throttle rate complies with Microsoft’s per minute sending rate, as referenced here under the heading ‘Sending Limits’. Note that Microsoft has a sending limit of 10,000 recipients per day.
Please contact your email provider to find out how many emails you can send per hour. Providers have limits to comply with their own policies and anti-spam legislation. Be a ware that if you have 3 users, each set to 100 email per hour, you could potentially be sending 300 emails per hours as far as your provider is concerned.
Adding Your Email Signature
In Recruit So Simple there are two types of signatures – a personal signature (edited here) and a company signature (edited under Company Details). Personal signatures are designed to contain your name and contact information and are inserted into every new email for you. The company signature is attached to all email sent by all users of your database. The company signature is designed to contain legal and disclaimer information. Personal signatures will appear in journals but the company signature will not.
Use the available formatting tools [3] to create your signature:
- Add a hyperlink via the Insert/edit link tool.
- Insert an image (for example your logo) with the Insert/Edit Image tool. Images should be saved as either JPG, GiF or PNG formats.
- Add HTML content by using the Source code <> option.
Advanced Account Settings
Click on ‘Advanced Account Settings’ [5] to reveal these additional options:
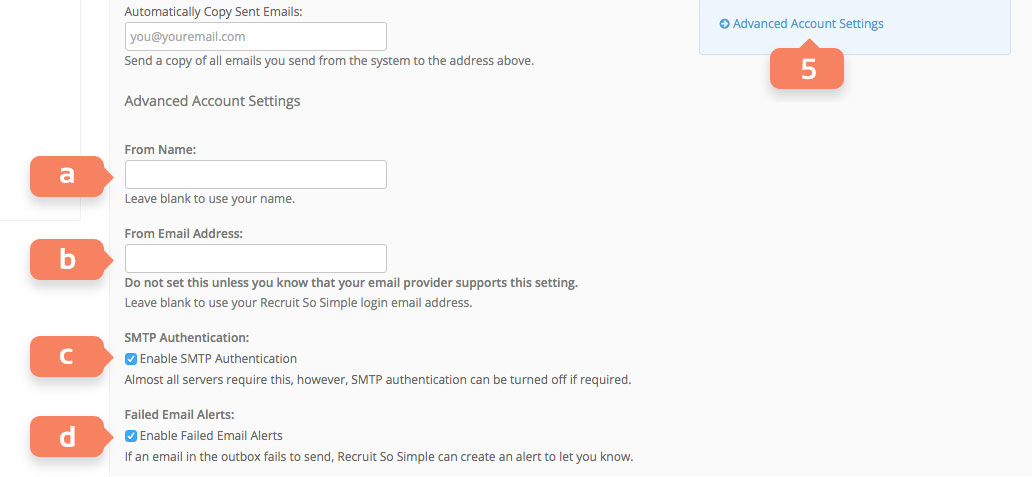
[a] By default, when you send an email from Recruit So Simple, the name that it will be “from” is based on your forenames and surname. If you prefer, you can set a custom name here. This is useful when you want all emails to appear from your company name, rather than your personal name.
[b] By default, when you send an email from Recruit So Simple, the email address that it will be “from” is based on your login email address. If you need to, and you know that your email provider supports it, you can set a custom email address here.
You must check with your email provider that you can overwrite the from email address. If your provider doesn’t allow this then your emails will either fail to send or will be flagged as spam when received.
[c] SMTP Authentication is a setting that your email provider can confirm. Most providers require this to be on.
[d] Failed Email Alerts will alert you if an email in your outbox fails to send. If you send to multiple recipients and some of those fail to send, you’ll be notified. You can check your Outbox to see specifically which ones failed.