
Settings > System Settings > Web > Website Integration
The website integration allows you to display your vacancies on your website – just by including one line of code. Candidates can then register and their details automatically imported into the system after you have reviewed them.
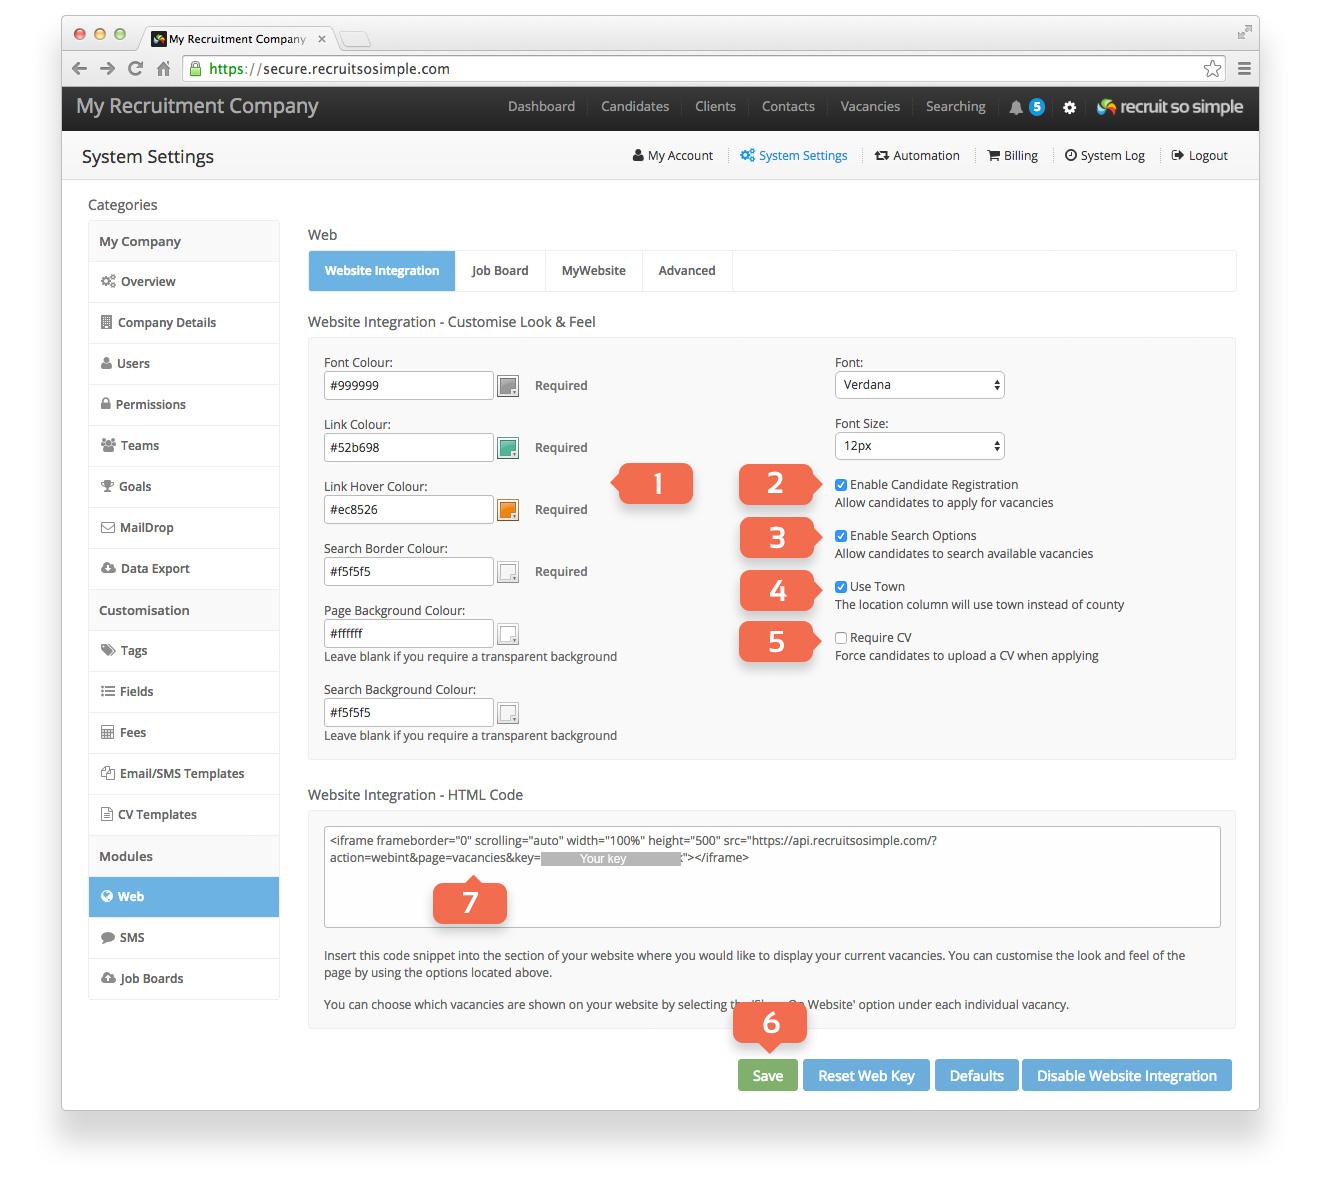
Options:
- Customise the colours to match the design of your website.
- Candidate Registration allows visitors to apply for your vacancies.
- Show or hide the search options widget.
- Location is taken from the client’s Site address. County is displayed by default, but you can choose to use Town instead.
- Require CV will ensure that candidates provide a CV with their registration.
- Update the module to see changes in the Live Preview and on your website.
Registration Terms
You can enable registration terms to be displayed on the application page that candidates will see. This can be useful if you want to require the candidates to agree to any terms and conditions that you have. To enable this, head to [Settings > System Settings > Web > Advanced] and specify the text. This text will be shown next to a check box on the application page and candidates must check the box in order to apply. Once the candidate is added to the database, the registration terms will be included in the notes field on the candidate, this provides a permanent record of what they agreed to.
Adding To Your Site
The most common way to include the website integration, is to copy and paste the code [7] from the Integration Code section at the bottom of the page. There are more advanced options below should you wish to use them.
The API supports HTTPS (SSL) connections should you require this.
Sharing Vacancies
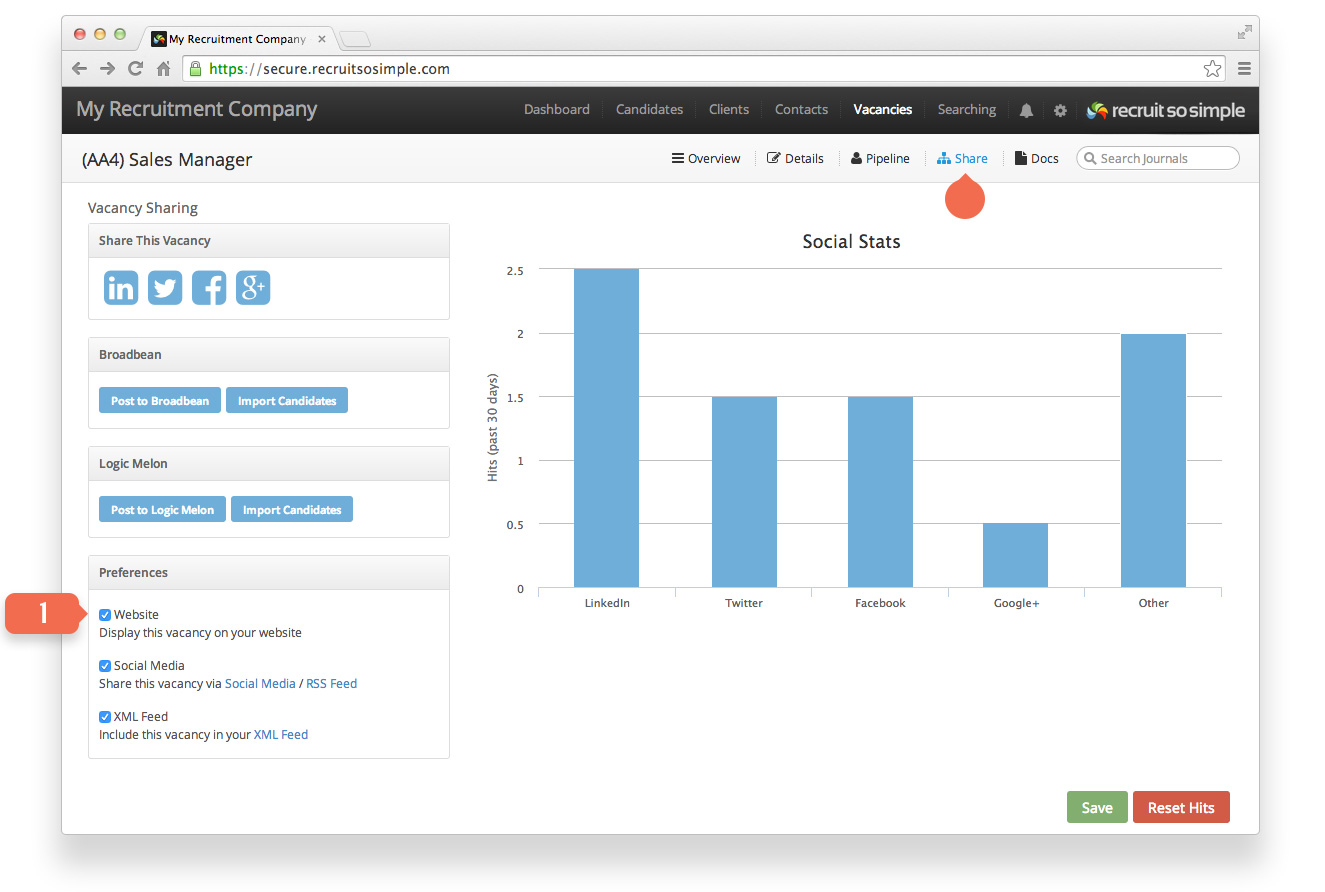
You can select which vacancies appear on your website under the ‘Share’ section (located under each vacancy) [1]. It will use the information from the Job Description (Website), Salary, Location and Permanent / Contract fields. The location will be based on the county of the client site that the vacancy is based at. If you wish to use the town instead, then click the “Use Town” option under the main module page. Closed vacancies will be automatically removed from your website.
When adding a new vacancy choose ‘Show On Website’ from the bottom of the Add Vacancy page.
Advanced Options
Show/Hide columns
To hide/show specific columns you can use the following code:
- https://api.recruitsosimple.co.uk/?action=webint&page=vacancies&key=[your_key_here]&cols=ref-pos-loc-typ-sal
To remove a column just remove the relevant shortcode. For example, to remove the ‘reference’ column, remove ‘ref’ from the code above. You can also remove the column headers by using the code ‘hidehead=1’
- You can modify the results returned by using the options below, however when using these, a basic list of jobs will be returned without any searching options. This is ideal for having a latest jobs feature on your website.
Limiting Results
To limit the number of results returned you can use the following code:
- https://api.recruitsosimple.co.uk/?action=webint&page=vacancies&key=[your_key_here]&limit=[number_here]
Results are always sorted by date, with the newest vacancies always appearing at the top.
Filtering By Tags
To only display vacancies that have specific tags assigned, you can use the following code:
- https://api.recruitsosimple.co.uk/?action=webint&page=vacancies&key=[your_key_here]&tags=[your_tag_id]
You can specify multiple tag IDs by separating them with dashes, each vacancy must have at least 1 of the specified tags in order to be displayed.
You can see the ID of a tag by editing the tag under [Settings > System Settings > Tags].
Candidate Registration
To link directly to the candidate registration page (so a candidate can register without applying for a specific job) then you can use the following code:
- https://api.recruitsosimple.co.uk/?action=webint&page=apply&key=[your_key_here]
If you don’t want the candidates to see a Continue button that redirects them to your vacancies list once their submission is successful, then you can add the applyOnly option:
- https://api.recruitsosimple.co.uk/?action=webint&page=apply&key=[your_key_here]&applyOnly=1
Modifying Links
If you require the vacancy detail pages to open outside of the iframe then you can use a URL Prefix. This will append a URL to the start of the API code. The examples on this page are written in PHP, but they can be re-written to work in any language you like.
In this example we have a page called job.php which contains the iframe code, and we want to open the details of a vacancy via a link from our home page. So we use the following code on the home page:
- https://api.recruitsosimple.co.uk/?action=webint&page=vacancies&key=[your_key_here]&prefix=http%3A%2F%2Fwww.yourwebsite.co.uk%2Fjobs.php%3Furl%3D
This will change all of the links to:
- https://www.yourwebsite.co.uk/jobs.php?url=[the_api_will_automatically_fill_this_part_in]
You must ensure that the address is URL Encoded (as above).
On your jobs.php page you then need to modify the iframe code to grab the ID of the vacancy:
- <iframe frameborder=”0″ scrolling=”auto” width=”100%” height=”500″ src=”<?php if(isset($_GET[‘id’])) { echo ‘https://api.recruitsosimple.co.uk/?action=webint&page=details&id=’.$_GET[‘id’].’&key=[your_key_here]’; } else { echo ‘https://api.recruitsosimple.co.uk/?action=webint&page=vacancies&key=[your_key_here]’; } ?>”></iframe>