
[Settings > Bulk Import > Candidates]
You can bulk import your candidates using either a CSV file or a ZIP file containing original CVs.
- The maximum file size for a CSV file is 5MB
- The maximum size for a ZIP file is 50MB, and we recommend no more than 500 CVs per ZIP, just to keep the import process manageable.
Import Candidates from a ZIP file
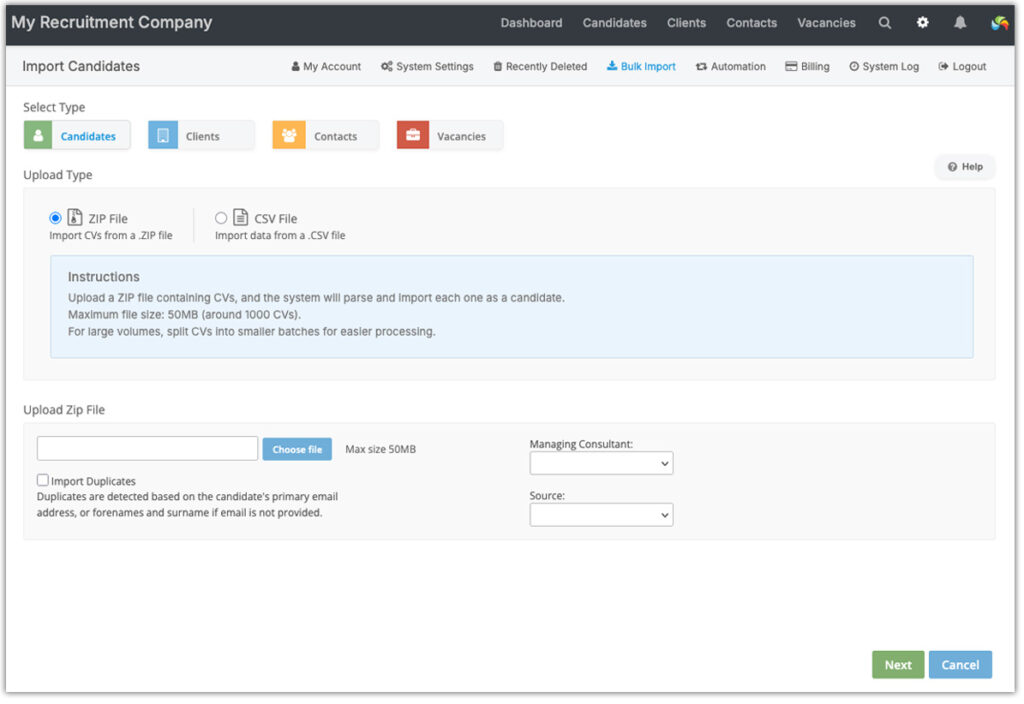
Step 1: On the Bulk Import screen, select Candidates from the buttons at the top.
Step 2: Choose the option for ZIP File.
Step 3: Locate and select your ZIP file (maximum size 50MB).
Step 4: Choose how to handle duplicates (by telephone number, primary email address, or the candidate’s name if the email address is missing:
- Skip (default): Ignore duplicates and skip them.
- Overwrite: Replace an existing record with the data from your CSV file (except name and primary email address).
- Duplicate: Add a new record, even if a suspected duplicate already exists.
Step 5: (Optional) select the managing consultant and the source for the imported candidates. Candidate sources can be added in [Settings > System Settings > Fields > Candidate Sources].
Step 5: Click Next to commence the import
A note for Mac users
When a ZIP file is created on a Mac, the operating system (macOS) adds an invisible duplicate folder (often named __MACOSX. Inside it are duplicate copies of your files, sometimes prefixed with an underscore (e.g. _johnsmithCV.docx). These files are used only when transferring ZIPs between Macs, so you normally won’t see them.
The RSS parser does detect them and may return an error about duplicate entries.
- This error can be safely ignored.
- Your candidate import will still complete successfully.
To confirm, check your Candidates grid — the records should be visible there.
Supported file formats
- Microsoft Word (.doc, .docx)
- Adobe PDF (.pdf)
- Plain text (.txt)
- Rich text (.rtf)
- Web based (.htm, .html)
- Open Office 2.0 (.odt)
Import Candidates from a .CSV file
You can either upload just a CSV file, or include accompanying candidate CVs.
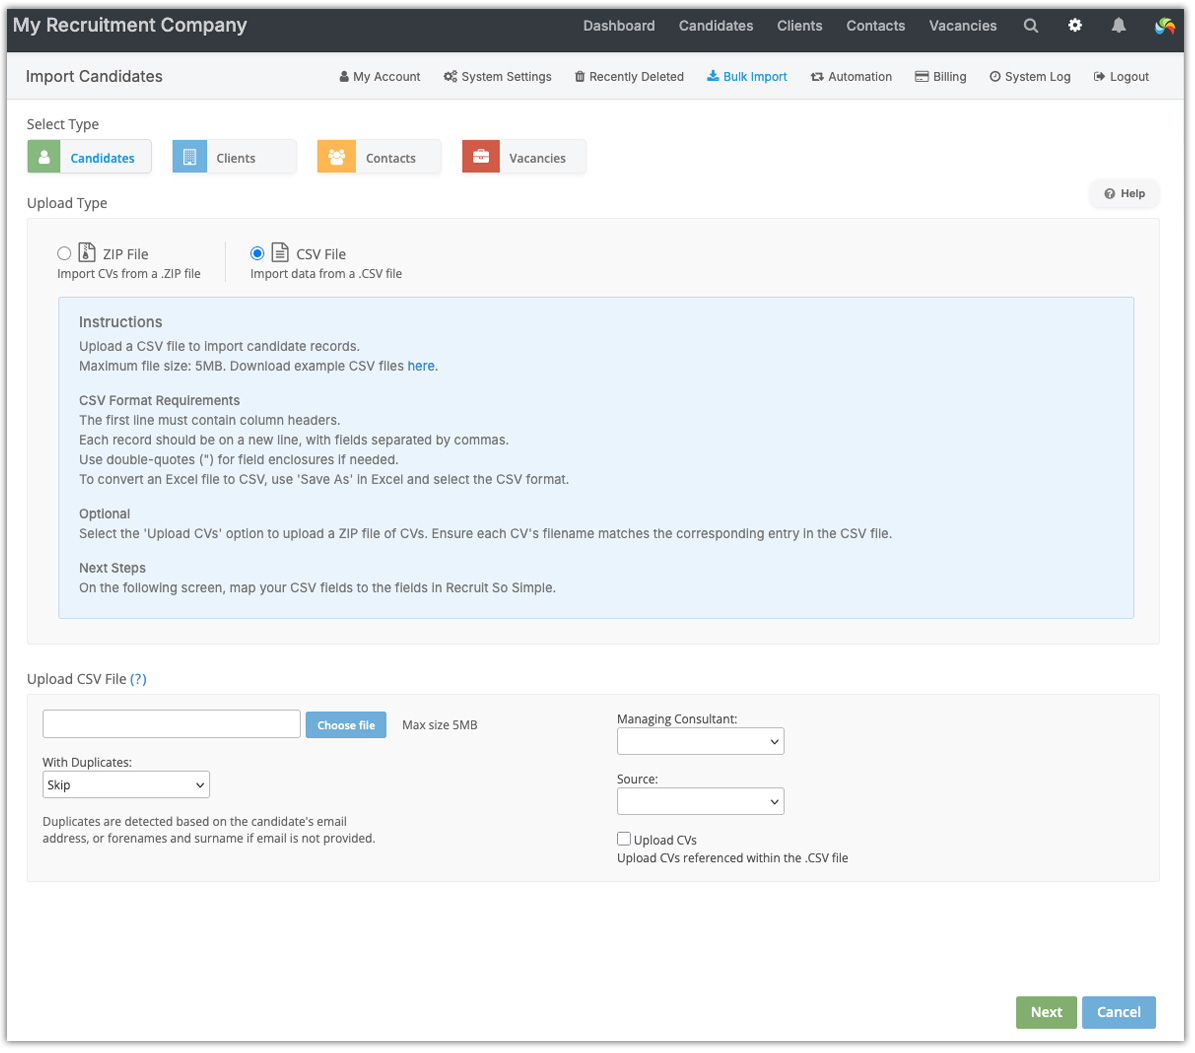
Step 1: On the Bulk Import screen, select Candidates from the buttons at the top.
Step 2: Choose the option for CSV File
Step 3: Locate and select your CSV file (maximum size 5MB).
Step 3: Choose how to handle duplicates (by primary email address, or name if the email address is missing):
- Skip (default): Ignore duplicates and skip them.
- Overwrite: Replace any existing record with the data from your CSV file.
- Duplicate: Add a new record, even if a candidate with the same name already exists.
Step 4: (Optional) select the managing consultant and the source for the imported candidates. Candidate sources can be added in [Settings > System Settings > Fields > Candidate Sources].
Step 5: If you have accompanying CVs, save them in a ZIP file and enable Upload CVs. Your CSV file will need a column containing the file name for each CV, for example: John_SmithCV.docx. You’ll be asked for the ZIP file during the import process.
Step 5: Click Next to move to the Field Mappings screen:
Field mappings
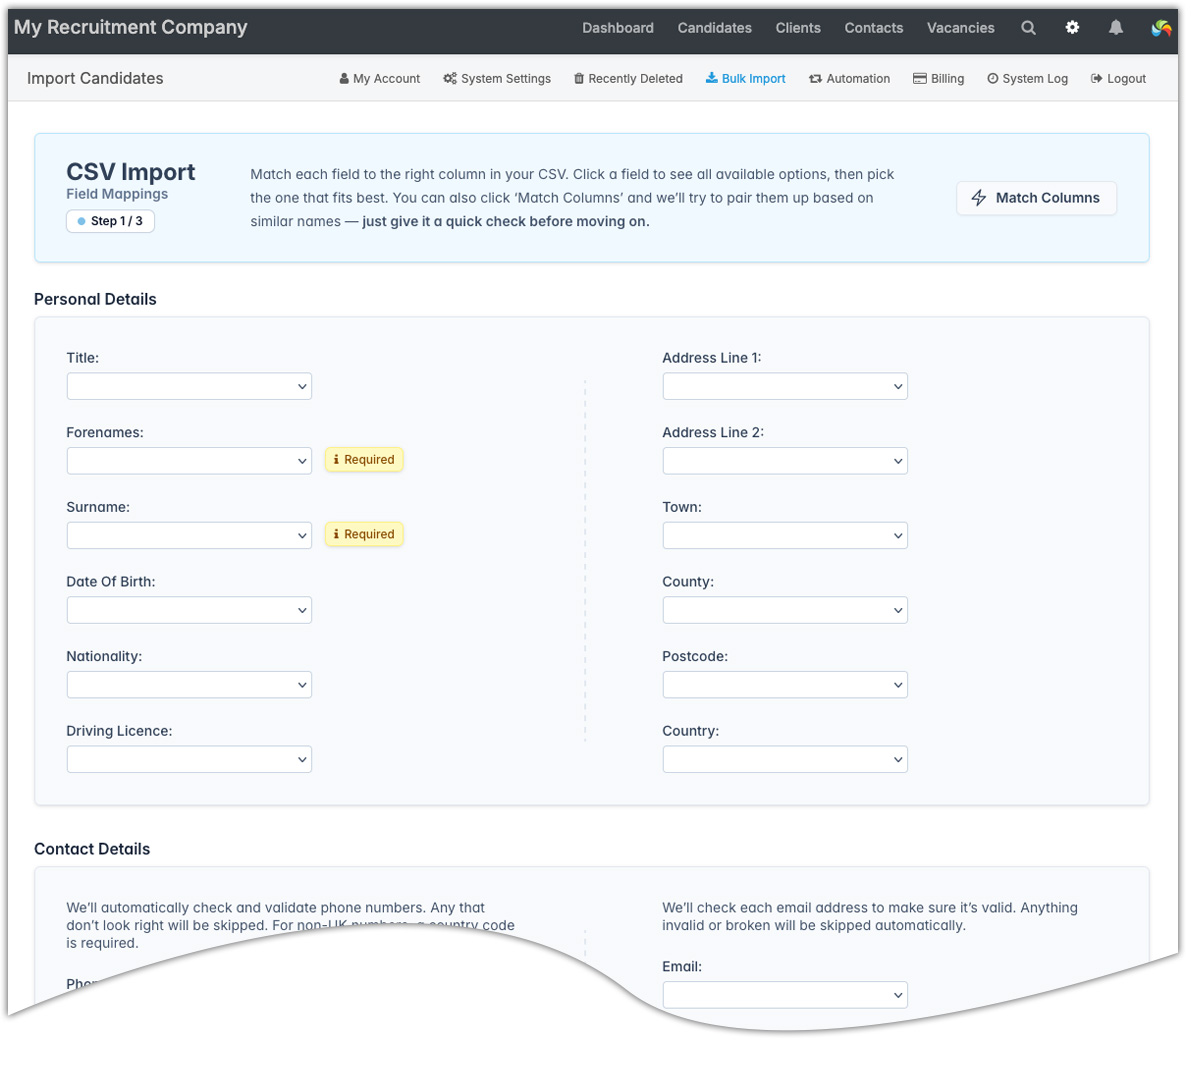
On the Field Mappings screen, you’ll match the columns in your CSV file with the correct fields in the database.
To do this automatically, click the Match Columns button. Review the suggested matches carefully, and make any adjustments where needed before continuing.
You can also match columns manually by selecting the appropriate field for each column.
When you’re ready, click Import located at the bottom.
Fields
Required: Forenames, Surname
All other fields are optional. Unmatched columns are ignored (no changes made). Empty cells are ignored (no changes made).
Nationality – add the nationalities that you require in [Settings > System Settings > Fields > Nationalities] before the import.
Country – the Country field must use the ISO standard format, e.g. United Kingdom, United States, United Arab Emirates. As well as allowing you to search records by country, this is also important for postcode radius searches: UK postcodes and US ZIP Codes are supported. The country value allows the system to apply the correct geolocation. If no country is specified, the system will assume United Kingdom.
Preferred Phone – in a Preferred Phone column, enter Mobile, Home or Work to denote the candidate’s preferred phone. This will then be displayed on the candidate’s record.
Do Not Contact – in a Do Not Contact column, enter either DNC or Contact. Empty cells or if the column is not used, the candidate will be contactable.
Social Media – accepts either a full URL or a handle (e.g. @JohnSmith).
Job Title, Company, Start Date – if including the candidate’s current job, Job Title and Company name are required fields. Start Date is recommended, otherwise, today’s date will be used.
Required Jobs – multiple required job titles must be separated with a comma.
Status – new records default to Active unless another status is specified. Custom statuses can be added in [Settings > System Settings > Fields > Candidate Statuses], and must be pre-set before the import.
Tags – add multiple tags separated by commas. If a tag doesn’t already exist, it will be created automatically and placed in a category named Import.