
Candidates > Groups
Clients > Groups
Contacts > Groups
Use groups to organise your records. A group can be anything you like, from a simple call list to targeted candidates for a marketing campaign. You can email or SMS message a group, you can also download a group to CSV file.
Working with Groups
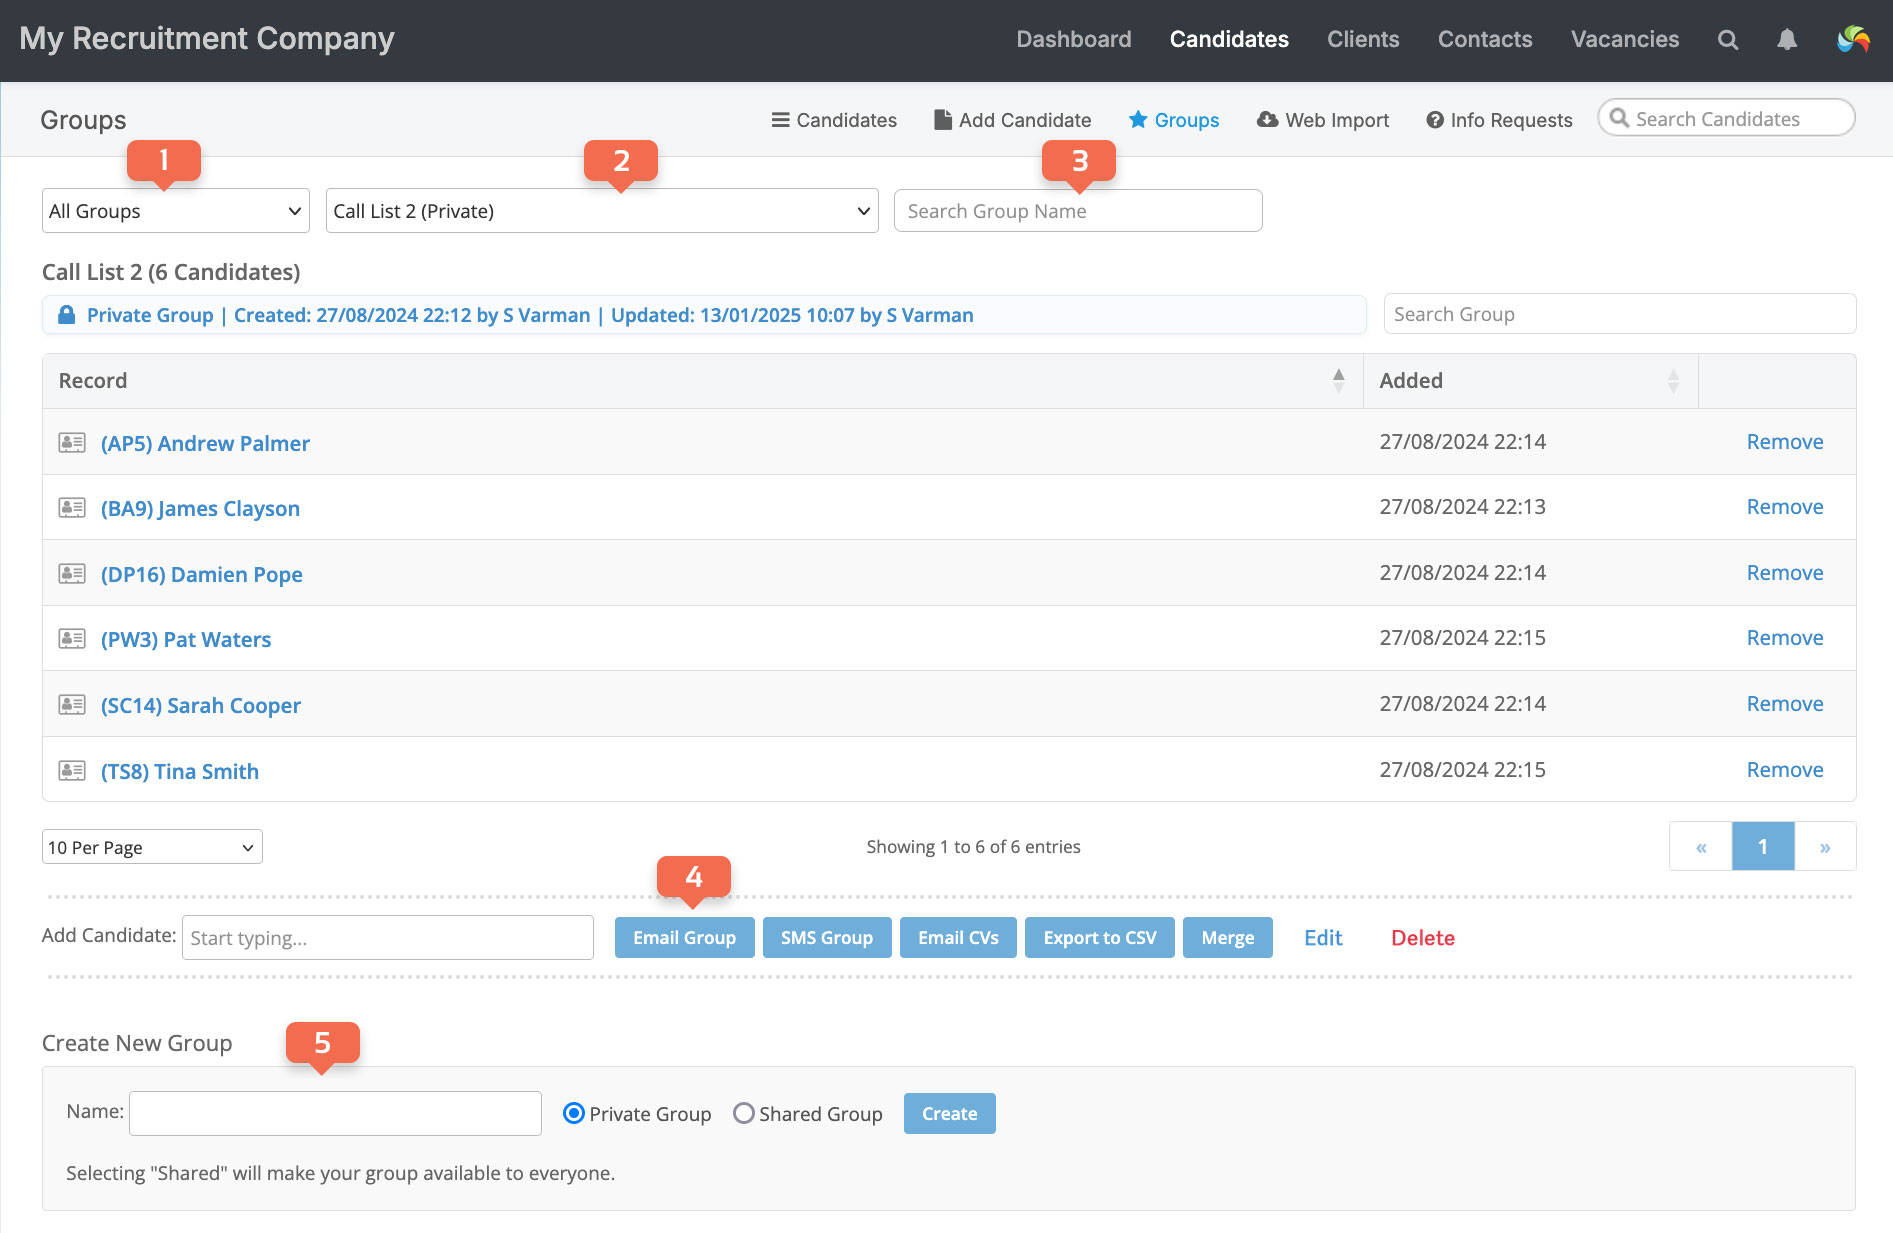
- Choose to view ‘Private’, ‘Public’ or ‘All Groups’
- Choose a group to view
- Find for a group by the group’s name
- Group actions:
- Email the group.
- SMS message the group.
- Email the CVs of the group (Candidate groups only).
- Export the group’s records to a CSV file.
- Export Clients only, or Contacts only, to a CSV file (Client and Contact groups only).
- Edit: Change the name of the group or designate it as Private or Shared.
- Private is only viewable by you.
- Shared is viewable by all users of the database.
- Delete: A group can be deleted by the user who created it or a system administrator.
- Create a new Group.
Use the Quick Preview to view each candidate’s record without leaving the Groups page (for candidate records only).
Adding records to a group
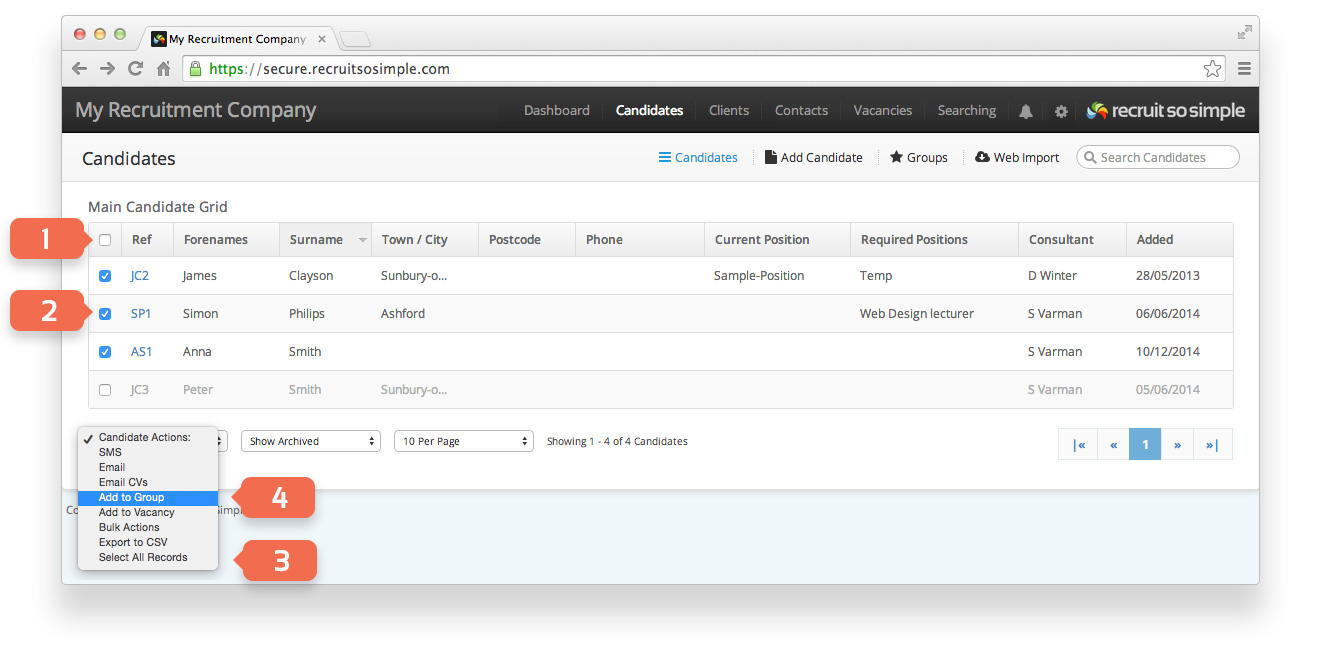
Select the required records, either per page [1] or make a selection [2]. To select all records on your database, or from a search, choose ‘Select All Records’ from the Actions menu.
With the required records selected, choose ‘Add to Group’ from the Actions menu.
Private and Shared groups
Other users can add and remove records for your shared groups. However, they will not be able to delete your group.
Clients and Contacts groups
Clients and Contacts share the same groups. If you click [Clients > Groups] or [Contacts > Groups], you’ll be taken to the same page in the system. When adding Clients and Contacts to a group:
- Adding a Client just adds the main contact.
- When emailing a client group, choose to email either main contacts or all contacts for each client.