
[Settings > My Account > Microsoft 365]
Easily send and receive email in Recruit So Simple by connecting your Microsoft 365 account. This streamlined integration replaces the need to manually enter server details, which Microsoft no longer fully supports.
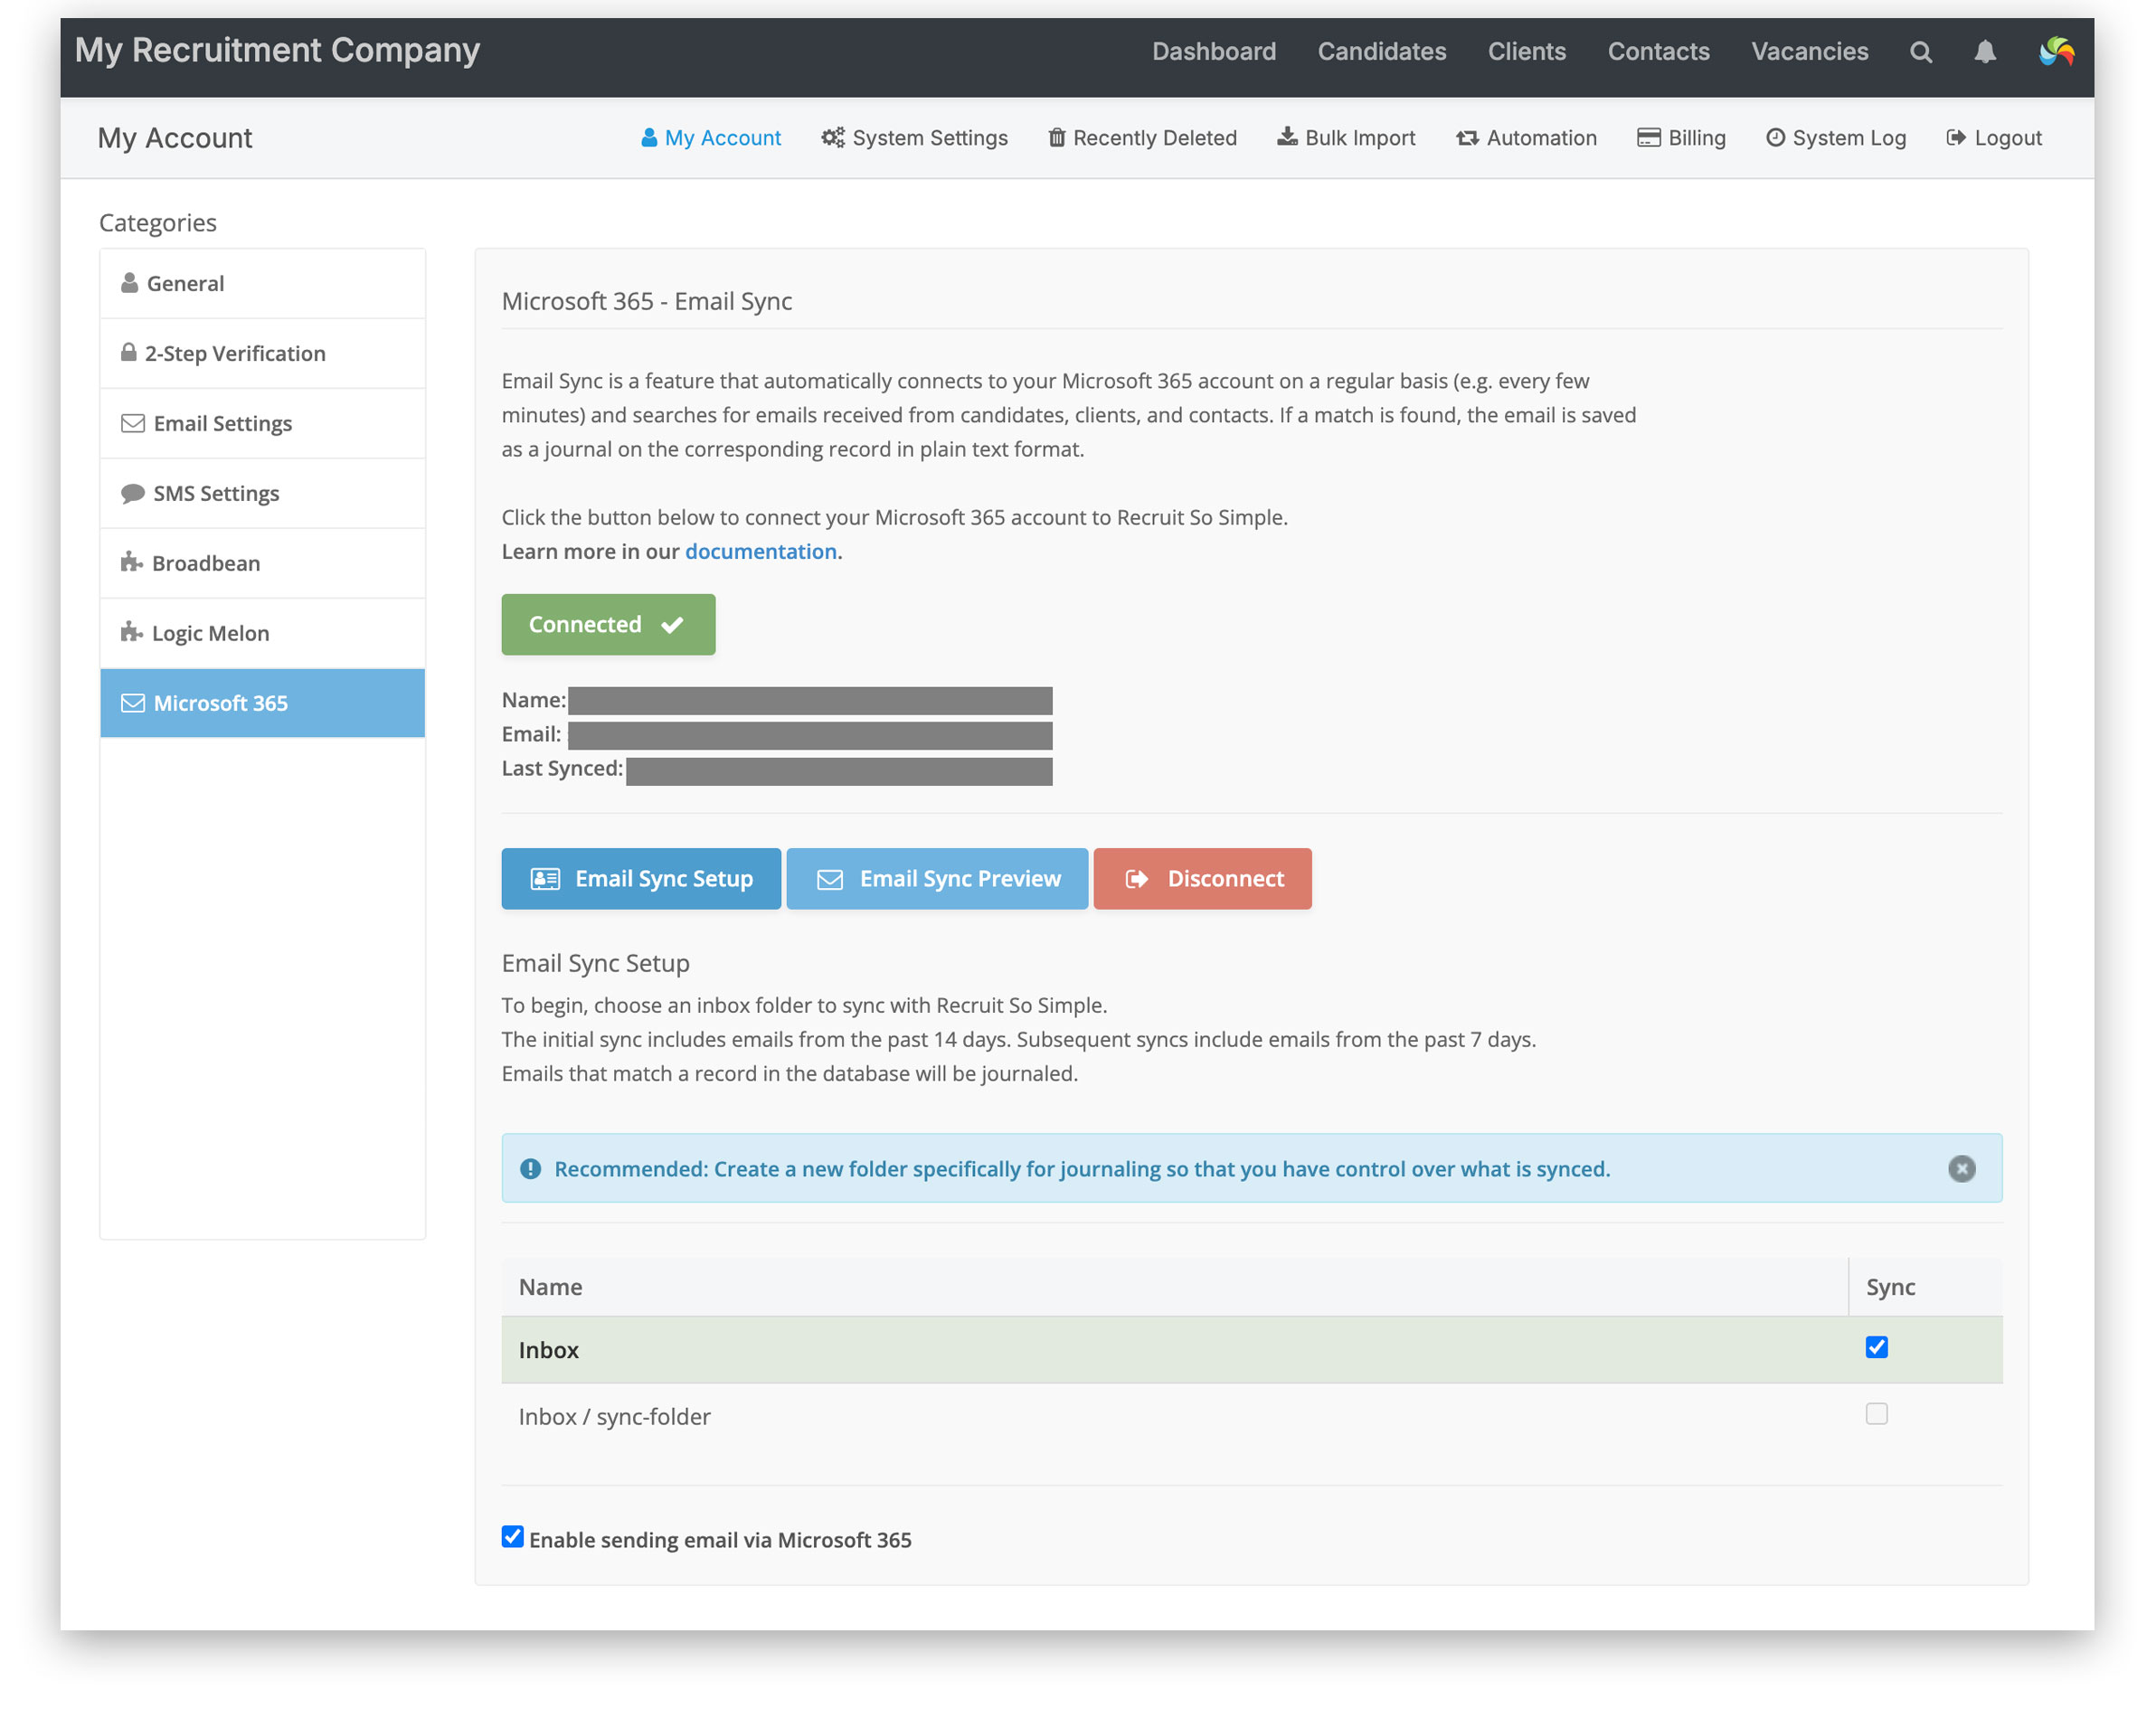
Connecting Your Microsoft Account
To connect your Microsoft 365 account:
- Go to [Settings > My Account > Microsoft 365].
- Click Connect to sign in and authorise your Microsoft account.
- If prompted with the option “Consent on behalf of your organisation”, select Yes.
This indicates you’re the Microsoft Administrator and will allow the rest of your team to authorise their own accounts independently.
Syncing Your Inbox
This step is optional and can be skipped if you only want to send email from your database. To enable email syncing, follow these steps:
- Click the Email Sync Setup button.
- Choose a folder to sync — typically your Outlook Inbox, or you can create a dedicated folder in Outlook specifically for syncing.
Automatic Email Journaling
Once your inbox (or selected folder) is synced, any email received from candidates or contacts will be automatically journaled to their record if the <from> address matches either their primary or alternative email address.
Important: Journals are not added immediately. For an email to be journaled:
- It must remain in the synced folder for one hour – do not move or delete it – or enough time for two sync cycles (see next points).
- Email sync runs every 20 minutes.
- Journaling occurs on the next sync cycle and only if the email is still in the synced folder.
This helps prevent duplicate journals from being created. - The first 10 records with a matching email address will be journaled.
Privacy Protection: You can prevent journals from being added by blacklisting specific email addresses. For example, this can help avoid the inadvertent addition of journals to records with your personal email address. You can add blocked email addresses in [Settings > System Settings > Company Details], under Auto-Journal Block List.
Sending Limit / Throttling
When you connect your Microsoft account, your email throttle is automatically set to 25 emails per minute (1,500 per hour). This helps you send bulk email efficiently while staying within Microsoft’s sending limits.
Sending up to 1,500 emails per hour can still trigger ISP spam filters. To protect your domain’s reputation, send email responsibly and avoid practices that may be flagged as spam.
You can view or change this setting via Settings > My Account > Email Settings.
Using a Third-Party SMTP Provider
If you prefer to send email through a third-party SMTP provider:
- Go to Email Sync Setup.
- Deselect Enable sending email via Microsoft 365.
- Then go to Settings > My Account > Email Settings to enter your SMTP provider’s configuration details.
Notes
- Microsoft requires reauthorisation of the connection every 90 days. If this happens, simply click Connect again to reauthorise. The system will alert you if reauthorisation is needed.
- If your inbox hasn’t synced for more than 24 hours (e.g. due to expired authorisation), the system will backfill the last 72 hours of email once reconnected. After that, it resumes normal syncing of email received within the past 24 hours.
Troubleshooting for Microsoft Administrators
If there are any issues, such as users being continually asked to request consent, you may need to check the permissions for the Recruit So Simple Email Sync app in your Microsoft Admin Center:
- From the menu on the left, go to [Applications > Enterprise Applications].
- Click on [Consent and permissions > User consent settings]. We recommend selecting “Allow user consent for apps from verified publishers…“. There should be 7 “permissions classified as low impact”, for the app to work:
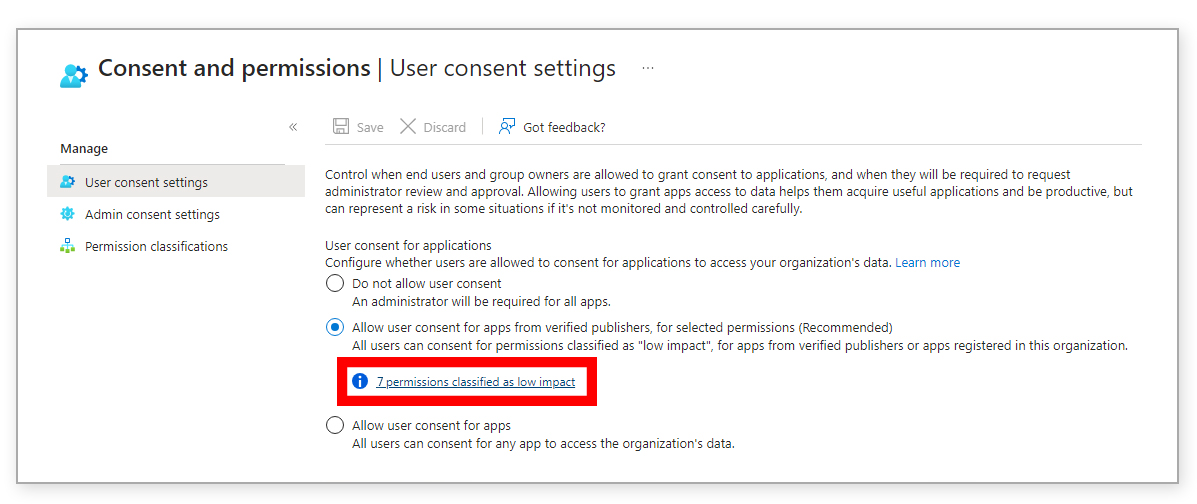
- To add missing permissions, click Permission Classifications > Grant admin consent for [your company name] and add all seven permissions from the table below:
| API Used | Permissions | Description |
| Microsoft Graph | offline_access | Maintain access to data you have given it access to |
| Microsoft Graph | profile | View user’s basic profile |
| Microsoft Graph | View user’s email address | |
| Microsoft Graph | openid | Sign users in |
| Microsoft Graph | User.Read | Sign in and read user’s profile |
| Microsoft Graph | Mail.Read | Read user email |
| Microsoft Graph | Mail.Send | Send email |
Security Defaults and Authenticated SMTP
Microsoft ‘Security Defaults’: If you have previously disabled Security Defaults in your Microsoft Admin Centre, this can now be re-enabled.
Authenticated SMTP: If you have previously enabled Authenticated SMTP for your users, this can now be disabled.