Clients > Add Client
Add a Client
Candidate > Add Client
The system keeps your clients (organisations) and contacts (people) separate. As a contact must be associated with a client, you must add your client first.
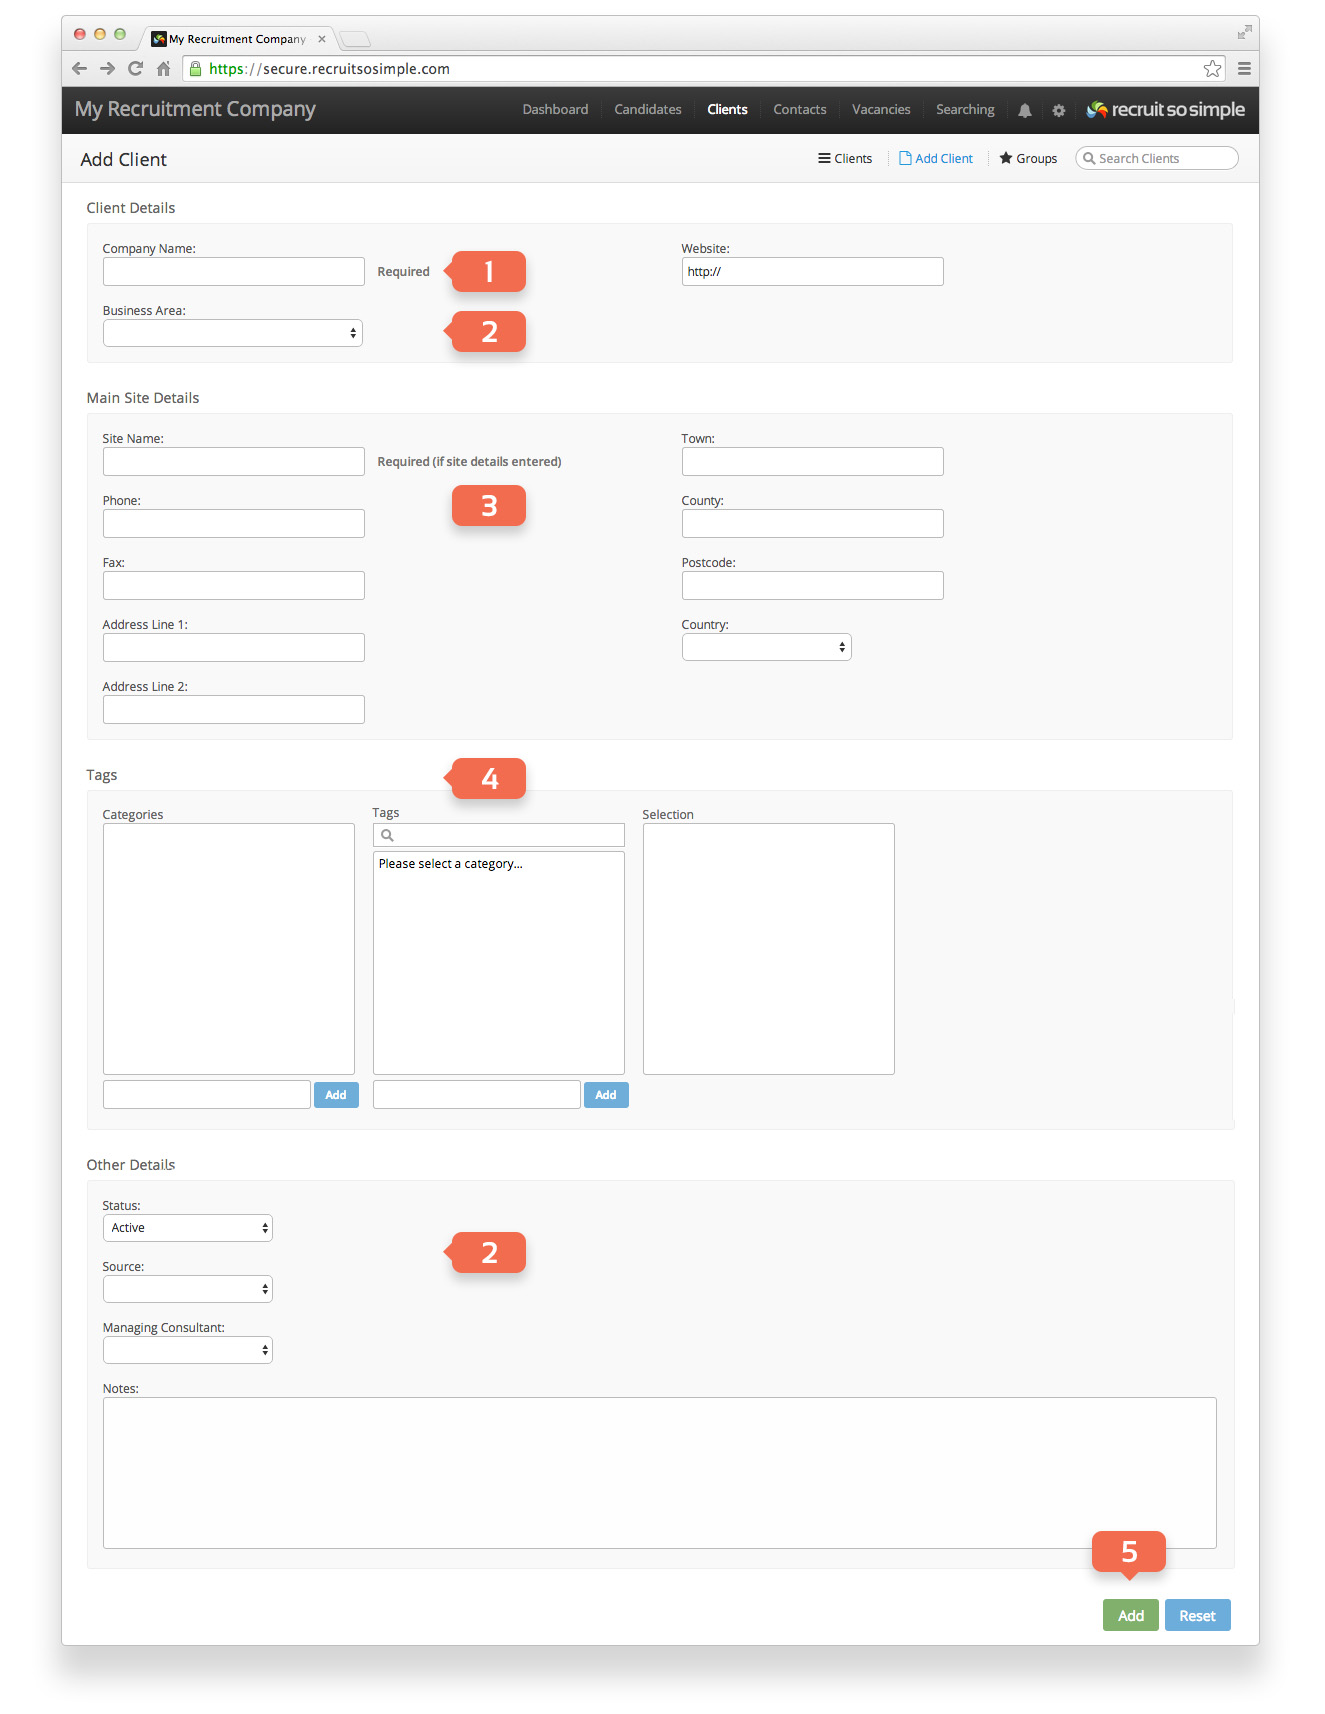
- Enter a company name.
- Customisable menus: You can enter your own list items for Business Area, Client Source and Client Status from [Settings > System Settings > Customisation]
- Add the name and address for the client’s main site.
- Tags: These are ad-hoc labels that can be used for anything to help search or identify attributes for your clients at a later date. You can think of categories as folders, each containing the Tags themselves.
- Click the Add button
- You can now add additional sites by clicking on the client’s Sites screen.
Add a Contact
Contact > Add Contact
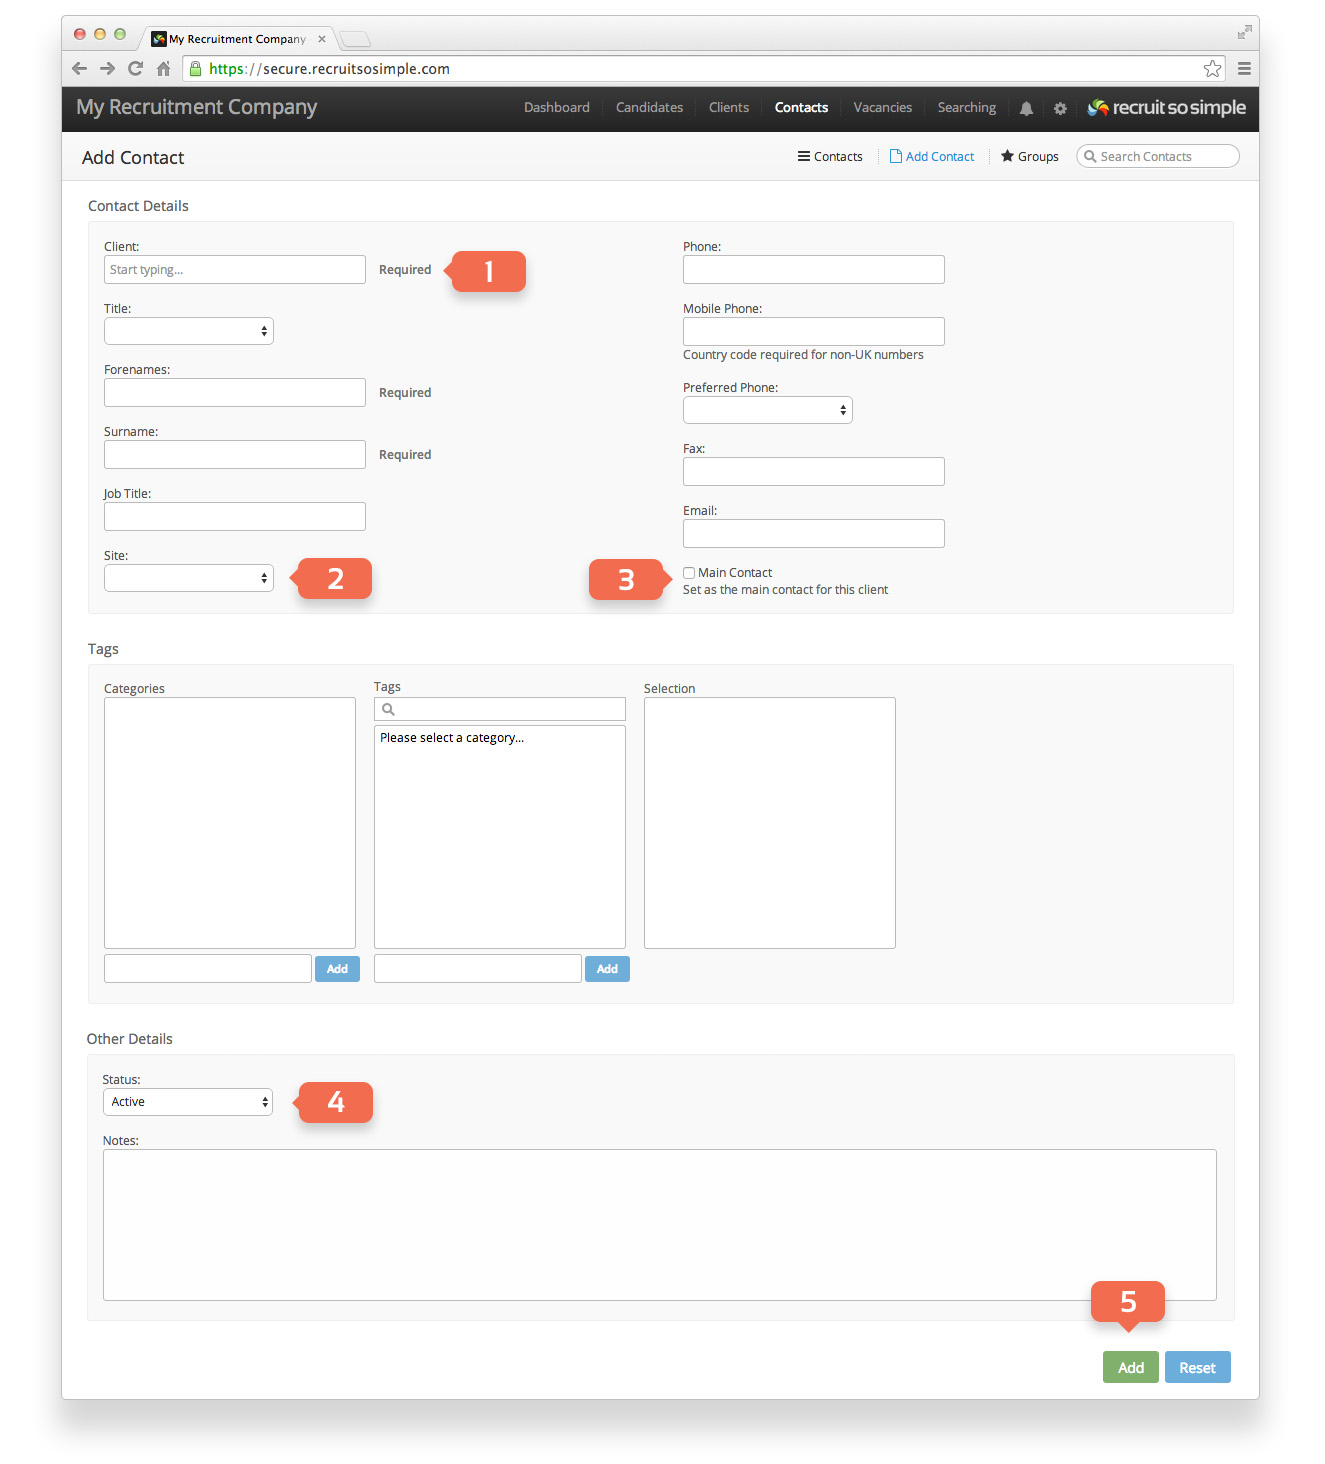
- Client: Start typing the name of an existing client and the system will offer you a list of choices.
- Site: If a client has multiple sites you can choose which one to associate the contact with.
- Main Contact: Choose if this record will be the main contact for the client.
- Contact statuses can be added in [Settings > System Settings > Customisation]
- Click the Add button.